Installation Instructions
Re:desk has an installation wizard that helps you to install the software.
The following instructions will guide you through the installation process. Usually, it takes 10-15 minutes to complete if your server is configured correctly.
Downloading and Extracting Re:Desk
Firstly, download compressed package with the Re:Desk files from our site to your local computer.
Now you need to place the files in a web accessible directory on your server or hosting account. This can be either the web root or any of its subdirectories like
If you have shell access to your web server and are comfortable with using a console terminal, upload the compressed package to the required directory on your web server and extract the archive via the following shell commands:
unzip redesk.zip
If there is only FTP access available, extract the archive on your local computer and then use your favorite FTP client to put the files from the package to the required directory on your web server. Make sure you retain the original file and directory structure.
Before the Installation Wizard is Started
There are a few things that you need to have and do before you begin installing Re:Desk:
- Check that your web server meets minimum system requirements.
- Ensure that you can access your web server via shell or FTP.
- Connect to your MySQL server and create a database for Re:Desk
- Check that you know a License Number for Re:Desk.
-
Change the original file permissions as advised below:
> chmod -R 777 assets/

> chmod -R 777 protected/runtime/
Be sure you are located in Re:Desk root folder before running these commands.
Running the Installation Wizard
Point your favorite web browser to run the installation script.
If you placed the Re:Desk files directly in the web root, open http://www.example.com/
If you placed the Re:Desk files to a subdirectory like /helpdesk/, open http://www.example.com/helpdesk/
Installation Procedure
Step 1: License agreement
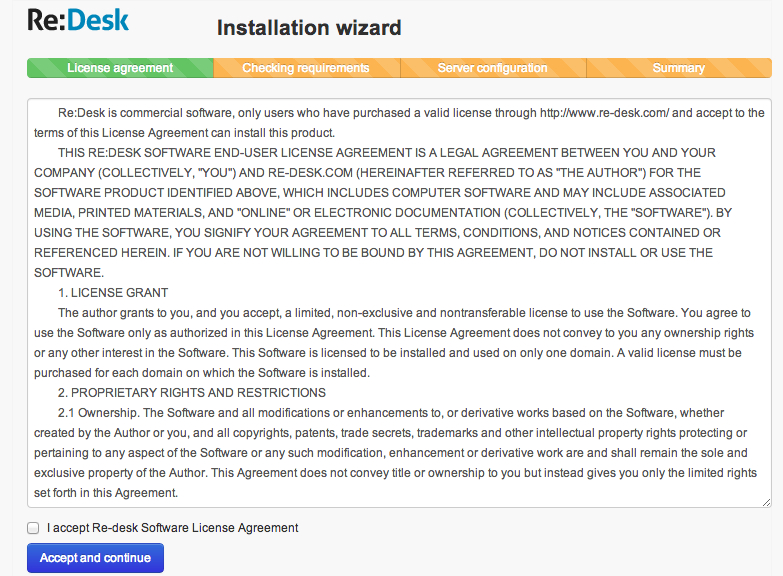
Please thoughtfully read the Re:desk License Agreement, and select the check box below the text of the Agreement to confirm that you agree with the conditions of the Agreement. If you do not agree with any part of the Agreement, stop the installation by closing the current page of the web browser.
Step 2: Checking requirements
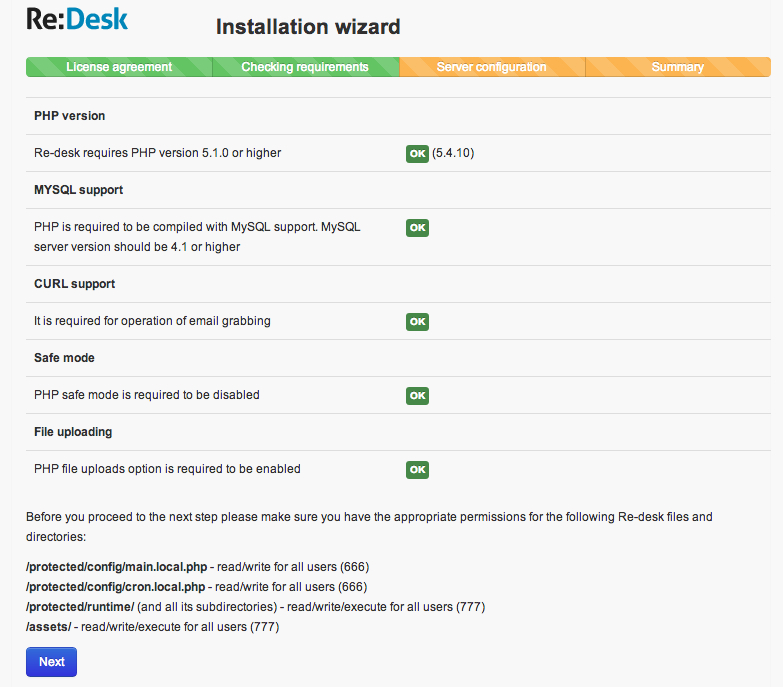
At this step, the Wizard checks that your web server meets the requirements to run Re:Desk. If some of the tested parameters are indicated as failed, you need to fix them before you can proceed to the next step of the Wizard and continue the installation.
Step 3: Server configuration
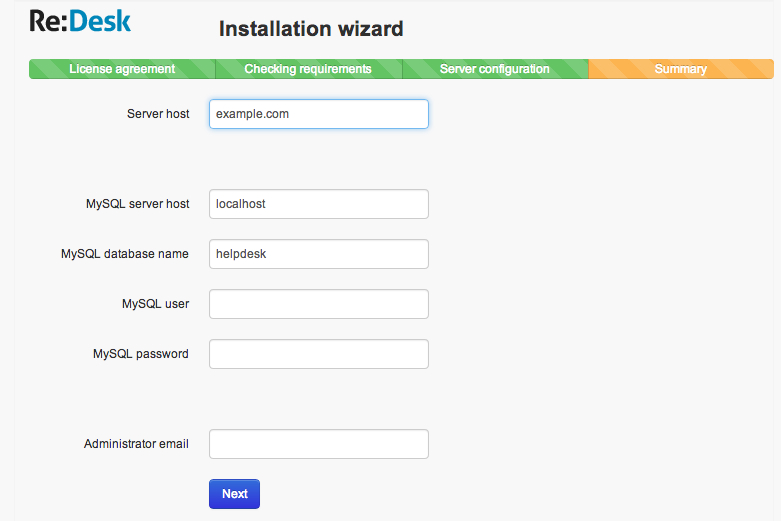
At this step, you need to provide the details of your web server host and MySQL server as well as specify your License Number (for Re:Desk paid version) and define other parameters.
The fields of this form mean:
- Server host name - DNS name of the server on which you are installing Re:Desk.
- MySQL server host - DNS name or the IP-address of your MySQL server.
- MySQL database name - name of your MySQL database.
- MySQL user - username for your MySQL user account.
- MySQL password - password for your MySQL user account.
- Administrator e-mail - email address of Re:Desk administrator in which you will receive email notifications.
Step 4: Summary
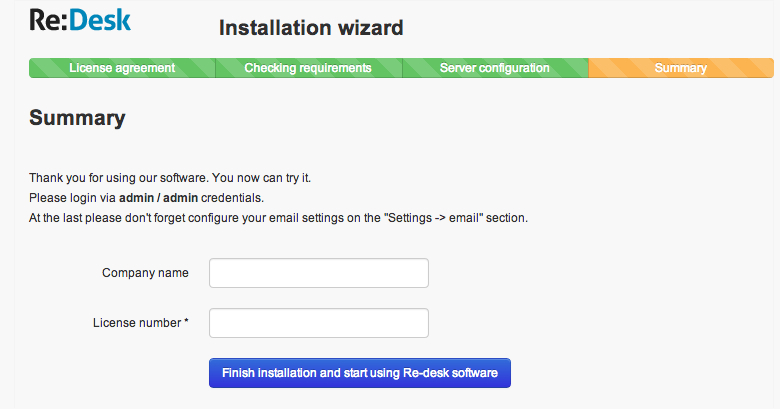
Re:desk will need your Company name and License number. And you should click "finish" button.
After the Installation
Set the following permissions for security purpose:
> chmod 644 protected/config/main.local.php

> chmod 644 protected/config/cron.local.php
The "chmod 644" command leaves the file readable and writeable for the file owner and makes it readable for all other system users. The file contents cannot be viewed in a browser though.
At the last you should add following script into your crontab -
[path_to_your_bin_dir]/php [path_to_helpdesk_root_dir]protected/cron.php mailretriver
Configuring Email Settings
One of the main feature of Re:Desk is an availability to fetch your emails and create tickets automatically.
To get this opportunity you should configure your email settings at "Settings -> Email". Re:Desk will automatically fetch new emails from specified email address and create new tickets with messages.
We strongly recommend you using IMAP email protocol because it is better and faster than POP3 protocol.
IMAP
If your email server has IMAP protocol, Re:Desk will fetch only unread emails, it is the best way to organize customer support with using Re:Desk.
POP3
If your email server has POP3 protocol, Re:Desk will fetch all your old email messages, so it is recommended to delete all emails of your mailbox which will be used as a customer support email address. This is the one big limitation of using POP3 protocol with Re:Desk.